How to successfully update Jetson TK1 to Ubuntu 16.04

I recently started a project on TK1 and needed to update to 16.04 to run ROS (ros-kinetic-opencv3) for a UAV drone.

Here are the steps I took to successfully update 14.04 to 16.04 with X11 Desktop support.

After initial flash when fully booted into 14.04 run the following commands:

Enable all ubuntu repositories if not enabled.

enable main repository,

sudo add-apt-repository main

enable universe repository,

sudo add-apt-repository universe

enable multiverse repository,

sudo add-apt-repository multiverse

enable restricted repository,

sudo add-apt-repository restricted
sudo apt-get update && sudo apt-get upgrade

Now to hold xorg packages and upgrade to 16.04

sudo apt-mark hold xserver-xorg-core

Run 16.04 upgrade:

sudo do-release-upgrade

If asked any questions just choose default or just press enter.

Remove obsolete packages?

167 packages are going to be removed.

Removing the packages can take several hours.

Continue [yN]  Details [d] YES

System upgrade is complete.

Restart required

To finish the upgrade, a restart is required. 
If you select 'y' the system will be restarted. YES

ssh back into Jetson TK1 and install Gnome Session Fallback and Choose Gnome Metacity after reboot on login screen:

sudo apt-get install gnome-session-flashback

Remember to set auto-login in User Accounts settings after selecting Gnome Metacity.

ENJOY!
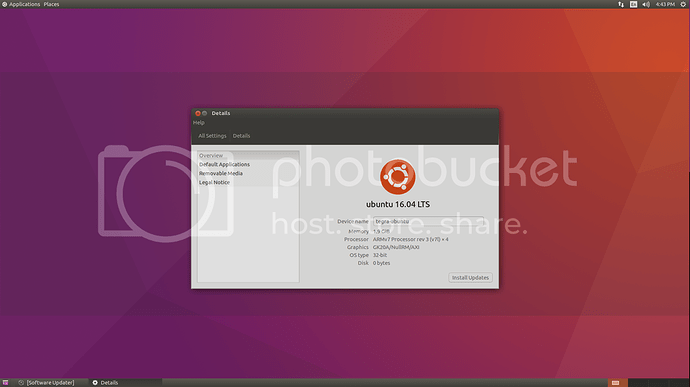
But…does CUDA work still? Do you see NVIDIA drivers from:

glxinfo | grep -i '(nvidia|version)'

Hey Hey linuxdev long time no talk. I am at work and not connected to DISPLAY 0 so I will check glxinfo when I get home tonight. So far everything is running well.

Here is xorg log:

[    12.406] (II) LoadModule: "glx"
[    12.410] (II) Loading /usr/lib/xorg/modules/extensions/libglx.so
[    12.719] (II) Module glx: vendor="NVIDIA Corporation"
[    12.719]    compiled for 4.0.2, module version = 1.0.0
[    12.719]    Module class: X.Org Server Extension
[    12.719] (II) NVIDIA GLX Module  21.5  Release Build  (integ_stage_rel)  (b6
[    12.719] Loading extension GLX
[    12.719] (II) LoadModule: "nvidia"
[    12.720] (II) Loading /usr/lib/xorg/modules/drivers/nvidia_drv.so
[    12.764] (II) Module nvidia: vendor="NVIDIA Corporation"
[    12.764]    compiled for 4.0.2, module version = 1.0.0
[    12.764]    Module class: X.Org Video Driver
[    12.789] (II) NVIDIA dlloader X Driver  21.5  Release Build  (integ_stage_r6
[    12.789] (II) NVIDIA Unified Driver for all Supported NVIDIA GPUs

Speaking of CUDA any idea if we are ever going to get an updated CUDA for TK1?

TK1 is only receiving maintenance releases. Unless it is a bug fix I wouldn’t expect anything (R21.7 just came out).

Hi @Linux4all, did Cuda worked with your method?

Yes cuda does work and installs fine through the latest TK1 Jetpack:

ubuntu@tegra-ubuntu:~$ nvcc -V
nvcc: NVIDIA (R) Cuda compiler driver
Copyright (c) 2005-2014 NVIDIA Corporation
Built on Tue_Feb_17_22:53:16_CST_2015
Cuda compilation tools, release 6.5, V6.5.45

Just installed using your method and everything seems to be working as expected! Thank you for this tutorial.

The CUDA examples at the ‘home’ folder did run OK.

I’m going to test more and report here any findings!

Now remember when compiling anything with nvcc you will have to use the older gcc 4.8 vs gcc 5 in 16.04.

sudo apt-get install gcc-4.8 g++-4.8 -y && \
sudo update-alternatives --install /usr/bin/gcc gcc /usr/bin/gcc-4.8 60 --slave /usr/bin/g++ g++ /usr/bin/g++-4.8;

When completed, you must change to the gcc you want to work with by default. Type in your terminal:
sudo update-alternatives --config gcc

To verify if it worked. Just type in your terminal
gcc -v

I had to build opencv from sources and cuda 6.5 only supports gcc 4.8 (NVIDIA possible to update Cuda for TK1?)

After upgrade to Ubuntu 16.04 what happens to boot procedure?
Is it always based on upstart?

Boot procedure remains the same afaik. I have been running 16.04 and have had zero issue thus far. Only thing I am missing is TensorRT ;) (arm64 only atm).

NVIDIA much appreciation for the Sticky!

Thank you so much for this! Worked great for me.

You are most welcome thank you for the thank you!

I am now working on upgrading tk1 to kernel 4.19 and I have successfully gotten nouveau and mesa built with instructions from NVIDIA’s git here: GitHub - NVIDIA/tegra-nouveau-rootfs: Manifests to create an Arch Linux ARM rootfs augmented with Nouveau and the OSS graphics stack for NVIDIA's Jetson TK1/TX1 boards

I can boot 16.04 with kernel 4.19 just by using those instructions and pushing the mesa build and kernel to tk1 and installing the patched mesa on current 16.04 and I do get a graphical desktop but I am still working out some bugs. I will post another how to for that very soon. My goal is to get 18.04 working with mesa but for now this 16.04 guide will suffice for almost all dev work needed on tk1.

Hi @Linux4all, thank you so much for this.

Could you share with us the procedure to update the kernel?

Sure ZEF let me get together a how-to later on today/tonight and I will link it at the bottom of the 1st post. There are some bugs like xorg/x11 freezes up so I am going to try no proprietary NVIDIA libs/drivers and use patched mesa and nouveau/drm alone this time around and see if I can work out the xorg issue before posting.

To make the procedure even easier I will link an APP image for flashing through nvflash :)

I followed this on my TK1 and things went mostly OK - except that the login screen (I do see it briefly) is almost immediately followed by a black screen where I can see nothing but my mouse cursor. (After a minute or two, I see a “Connection Established” for my ethernet, as well)

Any suggestions? Also, I’d love to find that kernel update procedure…

It’s very crucial that you issue this command BEFORE the dist-upgrade:

sudo apt-mark hold xserver-xorg-core

and after the upgrade installing gnome flashback should bring up the login screen after reboot.

sudo apt-get install gnome-session-flashback

You may have to reflash 14.04 and start the procedure again.

As for the 4.19 kernel I still have not gotten the bugs with X11 worked out enough. I will have some time this week to create the topic so others can help with the tweaks.

I followed the ordering you listed pretty closely, and definitely both help xserver-xorg-core and installed gnome-session-flashback after the reboot. The login screen comes up briefly, but is then overlaid with a black screen. I’ll probably mess around with this a bit, as I have another OS (NetBSD) installed on another partition of the internal flash that I’ll have to back up before re-flashing. If it comes to that, though, I’ll do it.

OK, cool - honestly, I hadn’t noticed how recently this was posted; I kind-of assumed it was months ago. ;) Thanks for the response!

These instructions DO NOT work!
They cause the device to freeze during the sudo do-release-upgrade because it takes too much resources. This was tried on a newly flashed device 3 times, every time failing.
Where can I find a ready ubuntu 16.04 image to flash on the device?

There is no officially supported 16.04 image. Support for the 32-bit platform “addition of features” ended (maintenance releases may exist). See:
https://devtalk.nvidia.com/default/topic/1029983/jetson-tk1/eol-for-nvidia-jetson-tk1-developer-kit/

L4T R21.7 was a maintenance release (Ubuntu 14.04) and not a feature release, and is an example of a release which occurred after feature addition ended. If there is another release this will be maintenance only, and will not support Ubuntu 16.04.

I’ve never tried to upgrade to 16.04. I don’t know if the resource which is running low is RAM or eMMC. If it is eMMC, then perhaps it was flashed without taking advantage of the maximum rootfs size. I do command line flashes like this to get the full eMMC used:

sudo ./flash.sh <u><b>-S 14580MiB</b></u> jetson-tk1 mmcblk0p1

The “14580MiB” is a raw partition size (times 1024^2), prior to overhead from formatting. However, if you run “df -H /” on the newly flashed TK1 (or even on one previously flashed), then you should see the partition size show as “Size” of “15G”. If you see less than “15G”, then probably you’ve used a default value which can be increased.

I would be surprised if the required resource which is failing is RAM, but if it is, then you might be able to add a swap partition on an SD card during the upgrade.