VS2022
CUDA11.8
Optix7.5
Win10 19045.2006
RTX2070
NvidiaDrive 545.92
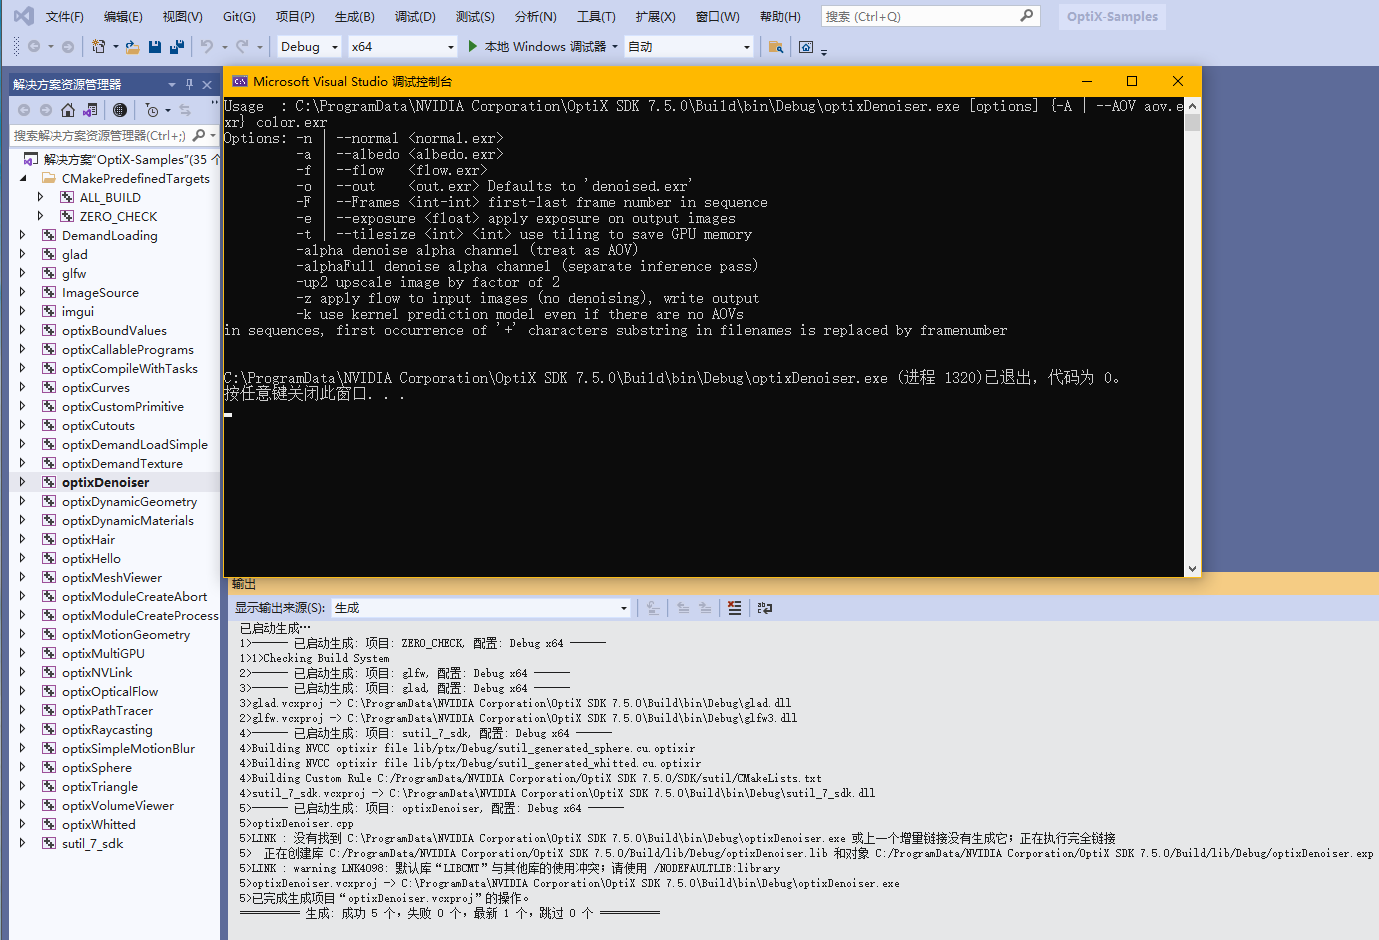
This is the complete printout:
Usage : C:\ProgramData\NVIDIA Corporation\OptiX SDK 7.5.0\Build\bin\Debug\optixDenoiser.exe [options] {-A | --AOV aov.exr} color.exr
Options: -n | --normal <normal.exr>
-a | --albedo <albedo.exr>
-f | --flow <flow.exr>
-o | --out <out.exr> Defaults to ‘denoised.exr’
-F | --Frames first-last frame number in sequence
-e | --exposure apply exposure on output images
-t | --tilesize use tiling to save GPU memory
-alpha denoise alpha channel (treat as AOV)
-alphaFull denoise alpha channel (separate inference pass)
-up2 upscale image by factor of 2
-z apply flow to input images (no denoising), write output
-k use kernel prediction model even if there are no AOVs
in sequences, first occurrence of ‘+’ characters substring in filenames is replaced by framenumber
C:\ProgramData\NVIDIA Corporation\OptiX SDK 7.5.0\Build\bin\Debug\optixDenoiser.exe (进程 1320)已退出,代码为 0。
按任意键关闭此窗口. . .
All other instances can run successfully, only optixDenoiser fails to run, this is the case for Optix6.5 to Optix8.0
The optixDenoiser executable strictly requires command line option arguments to work!
The usage message explains that it needs at least one *.exr file as argument (the “color.exr”) which is the noisy input image.
It’s not clear how you called it from within the debugger. Try something like this:
optixDenoiser.exe "<your_optix_sdk_installation_folder>\SDK\optixDenoiser\data\beauty.exr"
When your debugger working directory is set to $(ProjectDir) the relative path to the image data\beauty.exr should work as well.
Please read the README.TXT inside the SDK\optixDenoiser source folder for more examples.
When using the OptiX denoiser inside new applications, please use the AOV (“kernel prediction”) modes only.
Development on LDR and HDR denoiser modes has been discontinued.
OK, I understand. Thanks for your answer.