One of the new features in the Texture Tools Exporter Photoshop plug-in version 2021.2 is support for loading and creating custom mipmaps in files! This is one of the more hidden features, but I’ve gotten a lot of requests for this, so here’s a short post showing how it works!
The easiest way to get started with this feature is to load a file that already has mipmaps. That way, the texture layout’s already set up and ready to go. Here, I’m loading pattern_02_bc2.ktx2 from the Khronos KTX-Software repository (DDS is supported as well) using File > Open. If you check the “Load Mipmaps” box in the Read Properties dialog that appears:

you’ll get an image with mip 0 on the left, and each subsequent mip set next to it:

(You might notice some block artifacts here - that’s because this was originally saved with BC2 compression. Ideally, work with a lossless format, and then do one final export using a format like BC7, BC1a, or Basis if using KTX2.)
Here, mip 0 is 1024 x 1024. Each mip is half the size of the previous (rounded down, going no smaller than 1 pixel in each dimension), so mip 1 is 512 x 512, mip 2 is 256 x 256, and all the way down to mip 10 at 1 x 1. Here I’ve zoomed into the top-right corner.

Then you can modify the mipmaps however you like - some examples I’ve seen are
- Sharpening details in higher mips to account for linear filtering (e.g. in Bart Wronski’s article here).
- Storing custom versions of UI textures so they display well at lower resolutions.
- Decreasing opacity of higher mips so objects fade out at distances when the engine doesn’t support fading in other ways.
- Coloring mips differently for engine debugging.
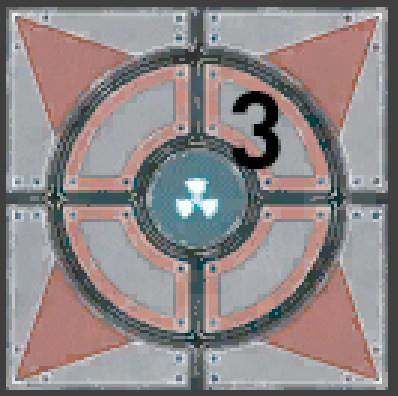
I’ll show off this feature by drawing a number on each mip.

To save this as a DDS file, go to File > Save a Copy… (in Photoshop 2022, the plugin appears in this menu instead of Save As… at the moment) and select DDS - NVIDIA Texture Tools Exporter (.DDS;.DDS).

By default, you’ll see a screen that looks like this, because we haven’t told it that this image contains custom mipmaps that we want to use.

We’ll tell it to separate the mipmaps we’ve created in this atlas by going to the top left and selecting “Extract Mipmaps From Atlas”. Set Number of Mips in Atlas to 11 (this must be set manually, because some files don’t have full mipmap chains, and some textures are rectangular!). Finally, uncheck “Regenerate Mipmaps” (otherwise, the tool will extract mip 0, and generate the rest of the mipmap chain).

You can then scrub through the mipmaps using the Mip slider on the top-right.


It looks like we have the layout correct, so go ahead and click Save!
2023-07-07 Update: Generating Mip Layouts
If you have an image without mipmaps, here’s one way to generate a mipmap atlas.
Photoshop
- Load your image into Photoshop. Here, I’m using
Lantern_baseColor.pngfrom the Khronos KTX-Software repository.

- Save it as a BGRA8 DDS image: Click
File > Save a Copy..., setting “Save as type” to “DDS - NVIDIA Texture Tools Exporter”, and click Save. Then in the Exporter window, set “Format” to8.8.8.8 BGRA, and click Save. The idea is that here we’re using the Exporter to automatically generate mipmaps and to save the result in a lossless format.

- Now, open the DDS file you saved in Photoshop. In the “NVIDIA DDS Read Properties” window, check “Load Mipmaps”, and then click “OK”. (If you don’t see the DDS Read Properties window, you can re-enable it by opening “Help > About Plugins > DDS - NVIDIA Texture Tools Exporter” checking “Show Dialog when Reading Files”.)
You’ll then have an atlas with mipmaps!

Standalone (requires Exporter 2023.3.0 or later)
Texture Tools Exporter standalone 2023.3.0’s command line now extracts mips by default from DDS and KTX images when saving to other formats (to turn this off, add --no-mips to your command line). This makes it possible to use the same process as Photoshop.
Open a Windows Command Prompt (click Start, and then type “cmd.exe”, and click on “Command Prompt”). Then run the following two commands:
"C:\Program Files\NVIDIA Corporation\NVIDIA Texture Tools\nvtt_export.exe" input.png --format bgra8 --output temp.dds
"C:\Program Files\NVIDIA Corporation\NVIDIA Texture Tools\nvtt_export.exe" temp.dds --output output.png
where input.png is the path to your input image and output.png is the path to where you want to save the image with mips.
For instance, if I wanted to generate mips for an image at C:\Users\nbickford\example.png and save it to C:\Users\nbickford\example-mips.png, I’d run
"C:\Program Files\NVIDIA Corporation\NVIDIA Texture Tools\nvtt_export.exe" C:\Users\nbickford\example.png --format bgra8 --output temp.dds
"C:\Program Files\NVIDIA Corporation\NVIDIA Texture Tools\nvtt_export.exe" temp.dds --output C:\Users\nbickford\example-mips.png
(If you’ve installed the NVTT Exporter standalone to a different location than the default, replace "C:\Program Files\NVIDIA Corporation\NVIDIA Texture Tools\nvtt_export.exe" with the path to nvtt_export.exe on your computer.)