I flashed the sdcard image using the balena etcher tool. After flashing the image, I am not able to boot the device from the SDcard. I am attaching the booting logs here.
The downloaded file is Jetson_Xavier_NX_QSPI_35.1.gz
But, flashcp jetson-xavier-nx-devkit.spi.img after first deleting /dev/mtd0 makes me more than a little nervous.
Also, after replacing QSPI will the Jetpack 4 SD cards still load?
QSPI is used in boot. In the case of SD cards, this (QSPI) is what is actually flashed by JetPack/SDKM. However, the boot content of 4.x releases is incompatible with that of 5.x releases. On eMMC models this also flashes eMMC. You can clone content of a 4.x release before going to flash 5.x for an eMMC model, but you would not be able to reuse the rootfs as the new rootfs (you’d have to port, but the clone would give you that content to make this possible with work).
No. There is usually a range of releases which are compatible (though no guarantee). No 4.x and 5.x will be cross-compatible for boot content in combination of the opposite release of SD card or rootfs.
Thanks for the confirmation that the upgrade to Jetpack 5.2 will remove my ability to continue to use the configrations developed with Jetpack 4 for this one NX device.
Now, I need to better understand the QSPI upgrade process. Following the above shown instructions, I downloaded the file <Jetson_Xavier_NX_QSPI_35.1.gz> to the Download folder.
Then, I am asked to erase the existing QSPI records with <sudo flash_eraseall /dev/mtd0>.
The next instruction <sudo flashcp jetson-xavier-nx-devkit.spi.img /dev/mtd0> does not reference the downloaded file.
I do not understand how that statement will successfully add the new QSPI records.
Also, if that instruction fails, how do I restore the old QSPI records before powering down the device?
This looks like a very risky operation to me.
Am I correct that the QSPI records are in the NX carrier board and not on the SD card?
That content is in the module. One would normally flash and expect that content to be updated in the flash, but to not explicitly flash just the QSPI. I do not think there is a method of backing off if it fails. You’d end up flashing again.
Incidentally, if a flash fails, one needs to reboot the Jetson to recovery mode again to flash again. An example of this is that you cannot clone a Jetson twice without rebooting it to a new recovery mode after the first clone.
Someone else would need to give you the correct commands and conditions to flash just QSPI since I have not done this before.
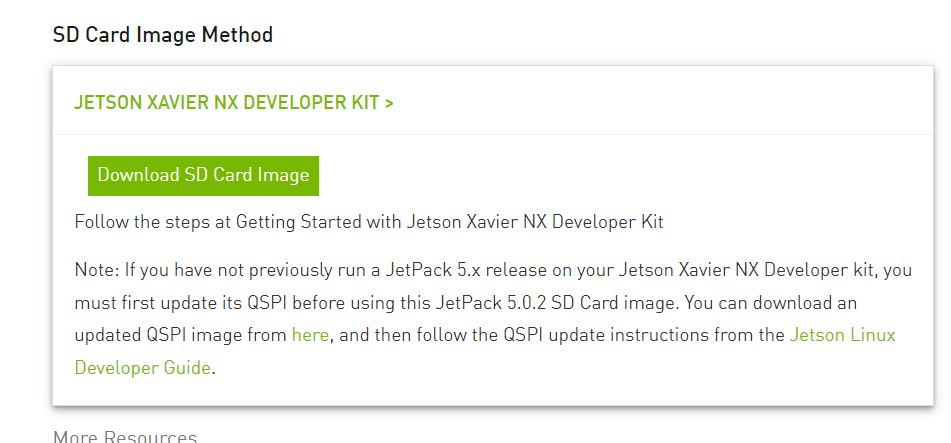
Follow the steps at Getting Started with Jetson Xavier NX Developer Kit
Note: If you have not previously run a JetPack 5.x release on your Jetson Xavier NX Developer kit, you must first update its QSPI before using this JetPack 5.0.2 SD Card image. You can download an updated QSPI image from here, and then follow the QSPI update instructions from the Jetson Linux Developer Guide.
It simply means that you have to flash the Jetson itself with the correct release, and that creating an SD card or other boot media is insufficient by itself. There are several ways to create boot media, but you need JetPack/SDK Manager to flash the Jetson module.
Thanks, the picture is comming into focus. I like it that you used the word simply. That is what I understand.
I think you also said I can go back to Jetpack 4.6 by using recovery mode. Am I correct?
Does recovery mode revert to the QSPI which was orginally delievered on the Jetson Xavier NX Development Kit?
If so, My concern is still with the written instructions about how to replace the QSPI in the documentation. If you examine the provided instructions, I do not see how flashcp finds jetson-xavier-nx-devkit.spi.img from the Download folder or from the Jetson_Xavier_NX_QSPI_35.1.gz file unless it is hard coded in flashcp module.
Yes, recovery mode is what puts the Jetson in a mode the flash software can talk to. The mode itself does not change anything unless the flash software runs, and the primary purpose of the flash software is to update QSPI. All “revert” behavior is strictly from the flashing itself since recovery mode itself only temporarily makes some commands available rather than actually causing a change.
One does not normally specifically flash QSPI. One merely flashes, and this by default updates QSPI. On an SD card model a normal flash is essentially a QSPI update.
I do not keep up on which specific file is loaded from where, but in general the theme is that you should log a “normal” flash of your board, and the log will show you exactly what file was used from where. In some cases there are reference files, and one is picked based on the model of board being flashed (JetPack can flash many models), and perhaps placed in the working location of the “Linux_for_Tegra/bootloader/” subdirectory or the “Linux_for_Tegra/kernel/” subdirectory, followed by later copy to the “rootfs/boot/” or similar location (including flash to a partition after signing). The log is the key to finding what goes where. An example: sudo ./flash.sh jetson-xavier-nx-devkit mmcblk0p1 2>&1 | tee log_of_flash.txt
Incidentally, the actual flash target is the name of one of the “.conf” files with the “.conf” part of the file name removed. If you are in the “Linux_for_Tegra/” directory you will find many such files via “ls *.conf”. Many of these are just symbolic links (aliases) for a conf file which is named after a combination of the SoC number and carrier board number (those two combined determine the device tree and kernel). In some cases, if you are building custom hardware, you might choose to copy a conf file, rename it for your board, edit for something in those files, and then simply use that name as the flash target.
Hi all,
related to this topic, i just encountered an issue along the QSPI update:
the first flash_eraseall /dev/mtd0 has been done
BUT
unfortunately the machine has been interrupted/powered off before the new img is written.
Then, the NX does not boot anymore.
How to solve this issue ? Is there any recovery mode… ?
You would need to flash the Jetson again. Recovery mode does nothing more than make the Jetson able to respond to flash software, and does not change anything by itself. There is no “factory image” reset, and flash is the only way to fix such things.
Hi kayccc,
I face similar issue. and I used SDK manager to flash my NX ( flash nvme0n1 directly). it works for 5.0.1, but cannot boot via nvme after flash 5.0.2. I know there a script to transfer the system to NVME. but it not so convenient (but can be acceptable).
Is there someone have tried PXE to exchange different jetpack verison? i found 5.0.2 can support PXE already.
Hi,
thanks for these answers. I installed sdkmanager on another linux machine.
After a long download period, the installation process starts. However, when ready, the flash process (for both Jetson Linux image AND Jetson Xavier NX steps) fails since the host cannot connect along the USB cable using IP address with the Jetson. However, be sure that the Jetson is seen by the sdkmanager when connecting it (lsusb indeed reports the device).
Maybe this is due to the fact that /dev/mtd0 has been cleared… and nothing done since then…
How to come over this ?
Regarding log,
i got the following lines:
→ INFO: start to check if ip and ssh with customize ip
→ DEBUG: running command < true >
INFO: command finished successfully
→ INFO exec_command: nc -z -vv -w 5 192.168.55.100 22
→ ERROR nc: connect 192.168.55.100 port 22 (tcp) timed out: operation in progress
blahblah
→ Cannot connect to the device via ssh. Check user name and password… or use the Manual Setup instead
What you’ve described is actually a successful flash, but a failure of network setup after the flash completes. For clarity, consider that no networking is used during flash in recovery mode, but once flash completes, the Jetson then reboots. It is then that ssh and optional package installs occur (using ssh). Flash finished, only the optional content failed.
The IP address mentioned is for the virtual network device the fully booted Jetson provides over USB. If the host PC security denies using the USB virtual network, then this could only be fixed by telling the host PC to allow this (the default is to allow). Or if the first boot account setup fails, then even if networking succeeded, no ssh login would be possible. Note that if the wired networking were used instead, and the IP address were entered in the SDKM setup, then the USB virtual ethernet would not be required (but first boot account setup would be required).
Consider that flash did complete, and that you could later run SDKM again, but tell it to skip flash and only install optional packages. You don’t have to reflash if you managed first boot account setup.
Note also that if video to the monitor fails, that often flash is still successful, and that serial console could be used instead for first account setup (which also makes debugging and fixing video issues easier).
In this case you would probably want two things to report:
A serial console boot log from the Jetson.
Monitor “dmesg --follow” on the host PC, and note what is seen as you plug in a fully booted Jetson’s USB (this would offer networking clues).
Well, as suggested, the manual installation (flash modality proposed by the sdkmanager) solved the problem and flashed the jetson making it able to at least boot (but not booting linux).
Next step was to install the linux image but the jetson could not communicate via ssh so i had to copy system on the sdcard as for a clean install and everything was OK.
All good, thanks